




Hello, today I’ll demonstrate how to install PHPUnit on Apple’s operating system. This guide should also be compatible with earlier operating systems in the apple family, such as Snow Leopard and Lion.
If you use the Microsoft Windows operating system, you can read this other tutorial: Installing PHPUnit on Windows.
Well, let’s install PHPUnit on OSX.
Open the Terminal and check whether PEAR is already installed with the following command.
| |
If it isn’t installed, the command’s output should look like:
| |
If you saw that message, you should follow this tutorial before continuing with the PHPUnit installation: Installing PEAR on OSX 10.8 Mountain Lion.
Let’s continue the installation, open the Terminal and run the following command:
| |
You’ll see a message like the one shown in the image below:
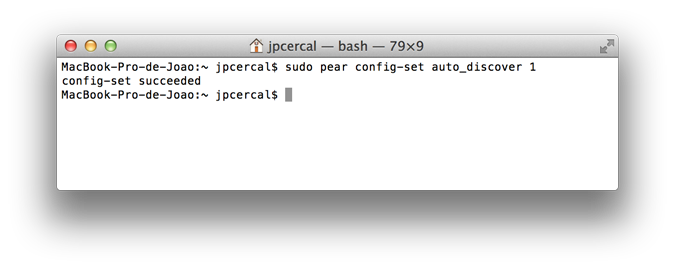
Once that’s done, you should run the following command in the terminal to install PHPUnit:
| |
PHPUnit was installed in the following directory: /Users/nome-do-seu-usuario/pear/share/pear/PHPUnit, to use it in your scripts, just include/check that your php.ini include_path already contains the PEAR directory.
To check this setting in your php.ini file, run the following command in the terminal:
| |
Your include_path will be displayed and should contain the following line:
/Users/nome-do-seu-usuario/pear/share/pear
If your include_path doesn’t have the line mentioned above, you should open the php.ini file and at the end of include_path add “:/Users/nome-do-seu-usuario/pear/share/pear” (without quotes).
Now let’s create a test class to check whether phpunit is working correctly.
Create a php file called “teste-phpunit.php” and add the following lines:
| |
Now run the test with the following command in the terminal:
| |
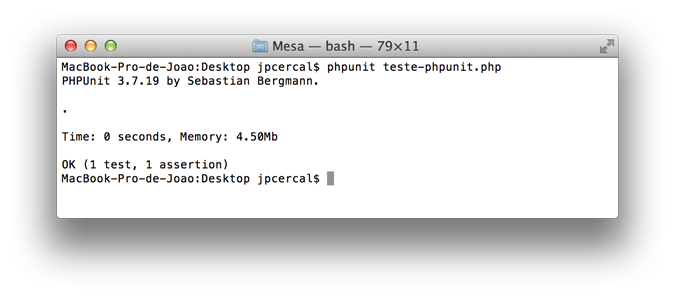
An image like this will be displayed, reporting that all tests ran successfully.
Do you have any questions? Do you already use PHPUnit in your projects? Leave a comment.